
1.The components of the DREAM Software suite
- DREAMCen (to manage the care centers)
- DREAMLab (to manage the analysis laboratories)
- DREAMMag (to manage laboratory consumables)
- DREAMFar (to manage central pharmacies)
- DREAMUpd (to create new databases, manage backups and software updates)
- DREAMBox (to import the results of laboratory machines)
2.General architecture
DREAMCen and DREAMLab softwares use a client-server technology. Various PCs where the client program DREAMCen or DREAMLab are installed access the server computer where the database engine resides via a local network.
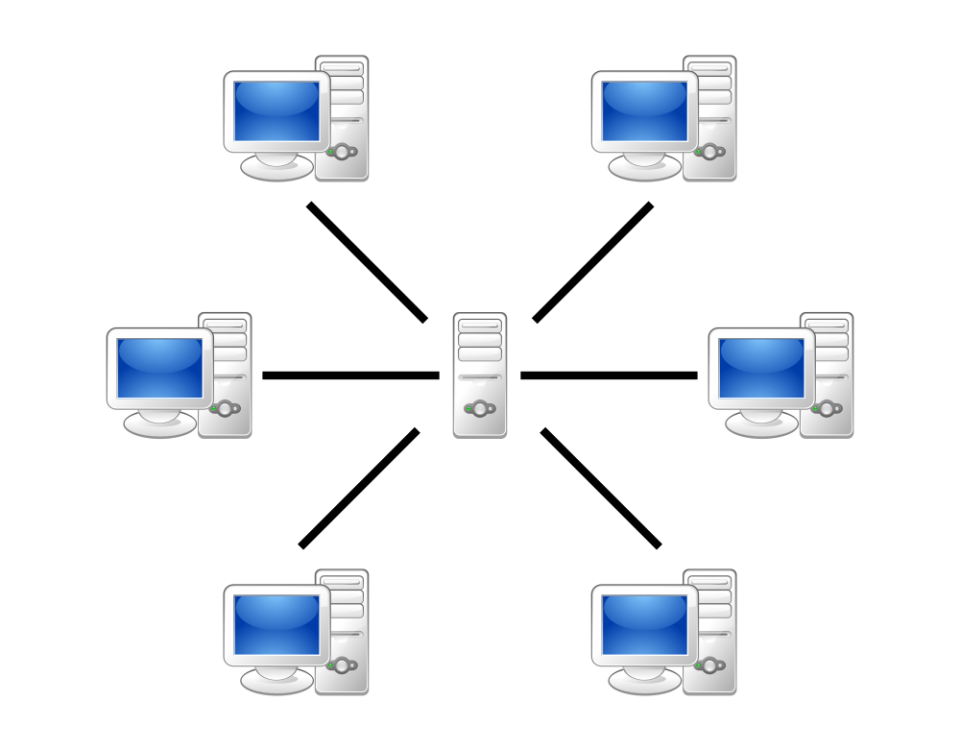
In the figure above the PC in the center is the server where the data resides. The various PCs, through the local network connection, access the server data.
The server expose also two shared folders:
the first called \\servername\dream_srv ( READ ONLY) contains the setup files for the update of the client software
the second called \\servername\dream_doc (READ/WRITE) contains the attachments for patient’s files
To permit the client to access the shared folder login name with the same username and password must exist both on server and client PC
Usually we create a dreamuser login both on server and client with the same password
3.Server preparation
In the DREAM Software system the server must expose the database engine services and share data files on two different shared folder..

Once we have a server with a functioning and updated operating system, we must therefore:
- Create users (with the same login name and password used on the clients)
- Create folder structure
- Install the database engine
- Open the network port used by the database engine on the firewall
1 – Create users . It is important that the same usernames and passwords are created both on the server and on the clients. For example, if you use the name loguser dreamuser on client PCs this will also be created on the server with the same password. If this is changed it will also be changed on the server. Obviously if you use the Domain management with Active Directory the creation of the users will be done exclusively on the server and the clients will have to register on that domain
Note: you can create the user and password on the server (also in windows 10 home edition) from Command promt (execute as administrator) with this command:
net user USERNAME PASSWORD /add
2 – Create folder structure . Below is the ideal directory structure that should be created on the server :
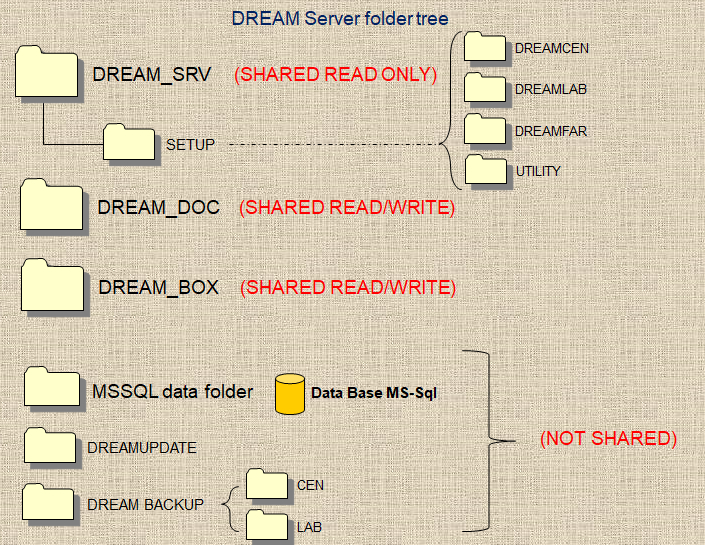
Prepare at least these folders on c:\ drive or other drive (we assume C:\ in the following examples):
C:\DREAM_SRV\ (SHARE THIS FOLDER IN READ ONLY FOR ALL THE USERS)
C:\DREAM_SRV\SETUP\
C:\DREAM_SRV\DREAMUPDATE\
C:\DREAM_SRV\BACKUP\
Create these folders inside the SETUP folder :
C:\DREAM_SRV\SETUP\DREAMCen
C:\DREAM_SRV\SETUP\DREAMLab (if used)
C:\DREAM_SRV\SETUP\DREAMFar (if used)
Create these folders inside the BACKUP folder :
C:\DREAM_SRV\BACKUP\CEN\
C:\DREAM_SRV\BACKUP\LAB\
… (you can create here other folders for backup of DREAMMag, DREAMFar, etc if used)
C:\DREAM_SRV\BACKUP\MSSQL\ (this is for SQL Server backup)
In C:\DREAM_SRV\DREAMUPDATE\ copy the DREAMUPDATE files
3 – Install the database engine. About the database engine it is possible to use both Microsoft SQL Server and mySQL or MariaDB but currently MS SQL Server is the only engine we support.
For SQL Server it is also possible to use the free Express versions even if they have limitations in the use of the memory and in the maximum size of the data files
4 – Open the network port used by the database engine on the firewall
Using SQL Server on windows firewall it is necessary to open the TCP PORT 1433 for incoming requests
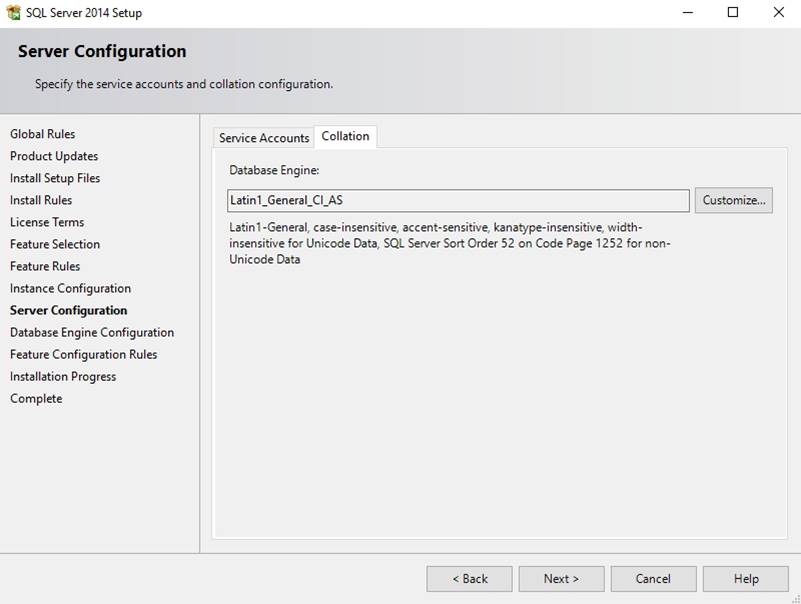
4.MS SQL Server SETUP
When installing SQL Server it is important to pay attention to some aspects:
- sql server must be installed as a default instance
- the default collation must set to Latin1_General_CI_AS
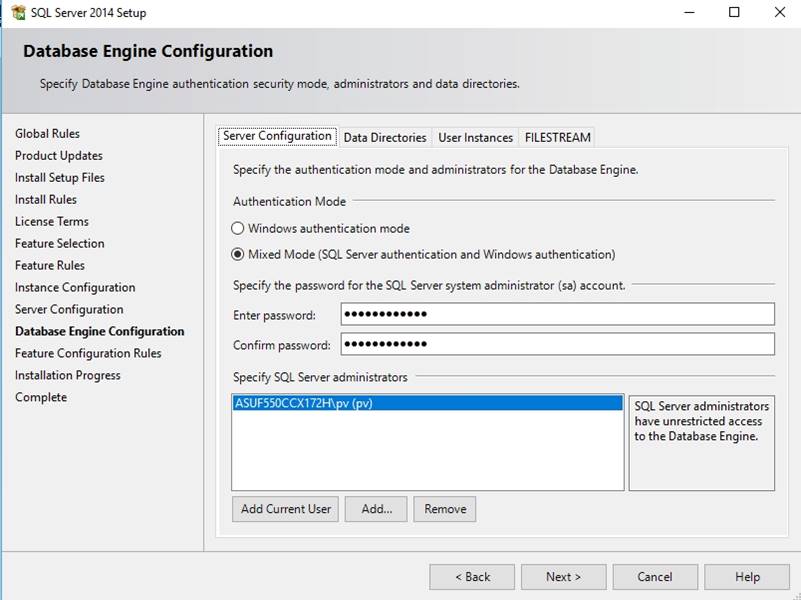
- the authentication mode must be set to MIXED
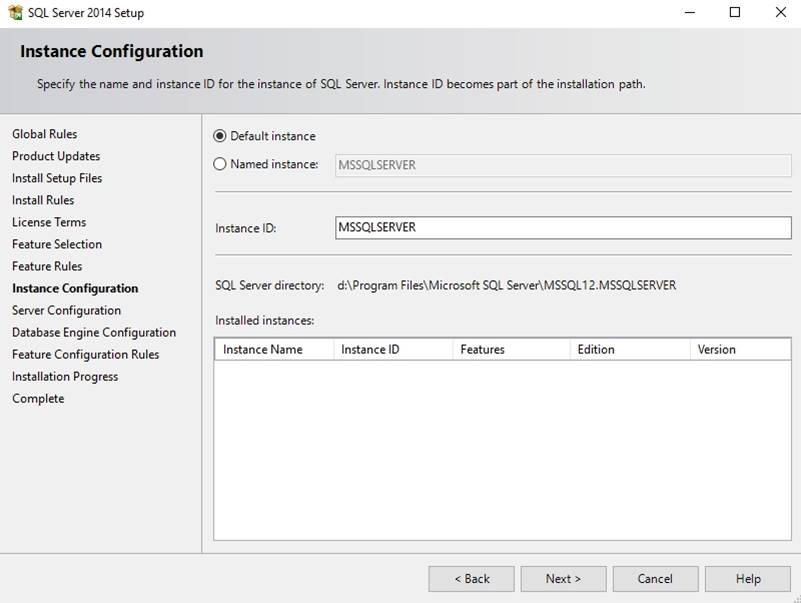
for sa (System administrator) user , for installations in DREAM centers, it is mandatory to ask the helpdesk for the password.
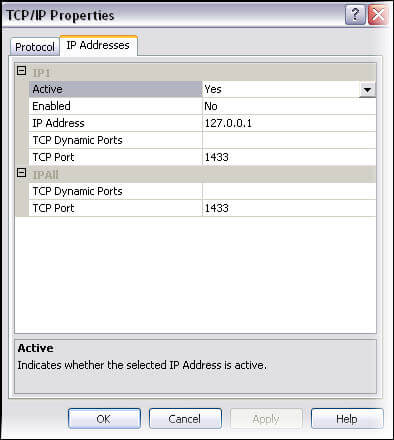
After the completion of the installation we need to configure SQL Server to accept connections on the network port and we have to open a port in the firewall to permit this connections.
First open the SQL Server Network Configuration (the name may change in different version of SQL Server) and enable TCP/IP protocol
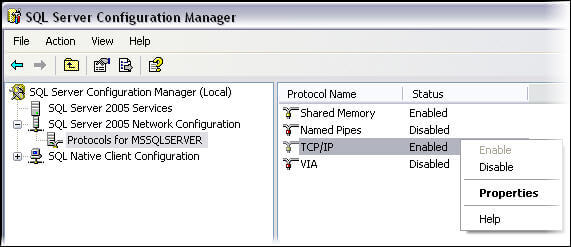
Click also on Properties to enable the specific ip address used and be sure you are using port 1433 TCP
Then you need to open the port used by DREAMCen clients to communicate with SQL Server
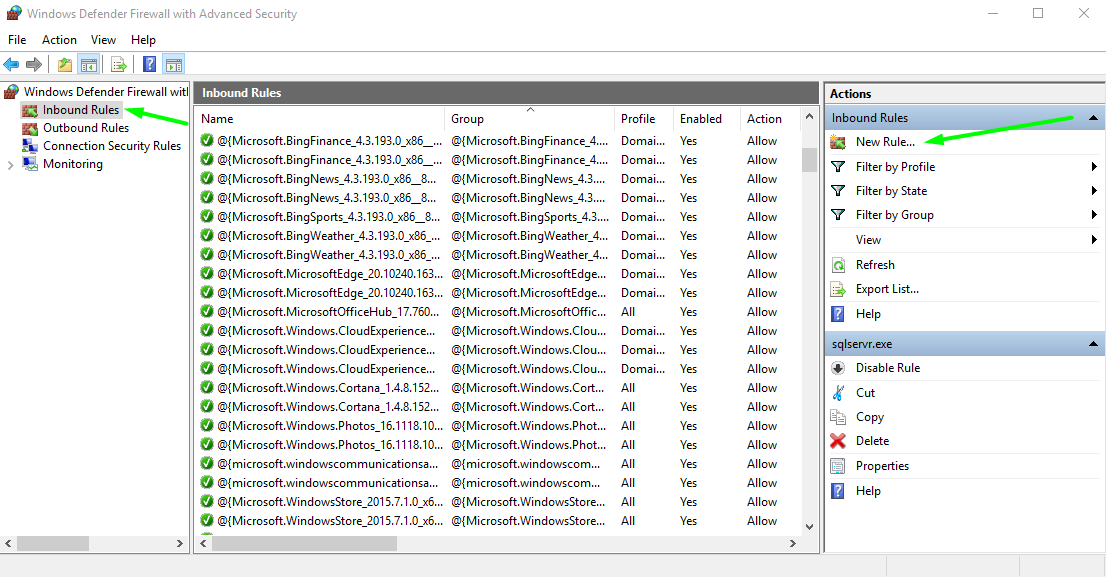
- Open Windows Defender Firewall and choose Advanced settings from the left side menu.
- Select Inbound Rules and click New Rule.
Follow the New Inbound Rule Wizard by choosing the Port radio button in the first step and click Next.
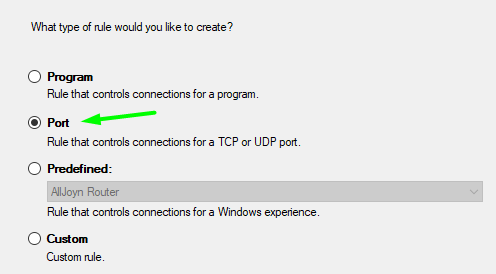
Select PORT,
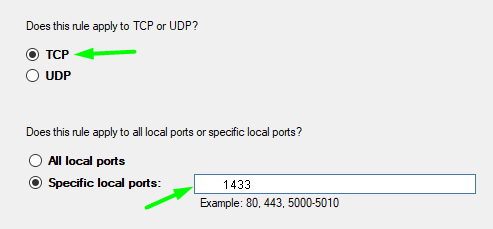
then TCP and enter the port number 1433 specifing local port
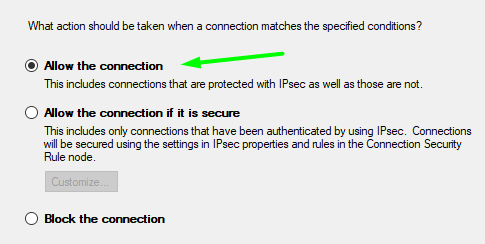 Allow the connection for all.
To create the database and database’s users please use the DREAMUPDATE utility