
1.DREAM UPDATE
1. CONFIGURATION
To configure Dreamupd for the first use
1.1. How to run the program
1.2. Configuration
2. MIGRATION
To migrate from old Dream_Upd.mde to new Dreamupdate and other uses
2.1. Migration
3. DATABASE BACKUP MANAGEMENT
To configure backups and DreamCen client automatic update
3.1. 1. Backup configuration
3.1.2. Backups functions
4. SCHEDULE TASK
To configure schedule tasks for backup and software update
4.1. Scheduled task
4.1.1. Database creation
4.1.2 Tasks Schedules in Windows Server2003
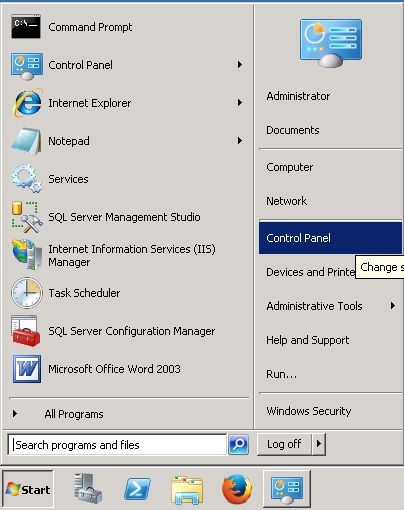
1.1.Running DREAM UPDATE
Download the last release of DreamUpd from the Ftp Server
FROM THE FTP SERVER DOWNLOAD: DREAMUpd_xxxxxx.zip
LOCATED IN: \Dream\dreams\DREAM_UPD
UNZIP THE FILE IN YOUR DREAM_SRV FOLDER INSIDE A FOLDER NAMED
• DREAMUpd
DOUBLE CLICK ON DREAMUpdate.exe TO START THE APPLICATION

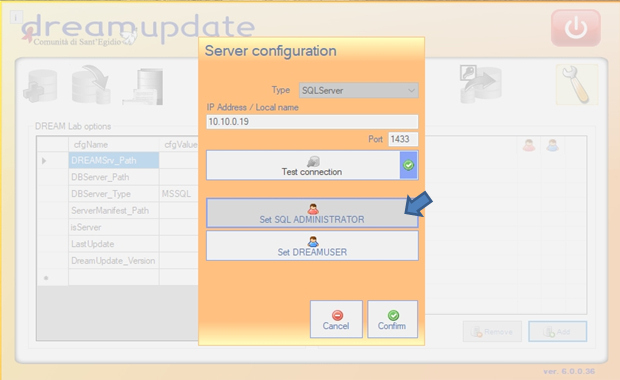
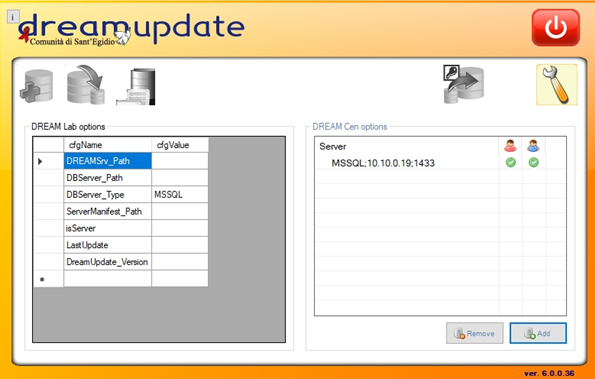
1.2.Configuring DREAM UPDATE
Start the application using the DREAMupdate icon

Wait for the application to start. The following screen will be shown:
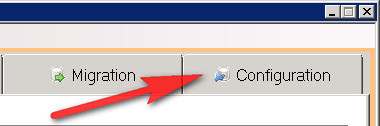
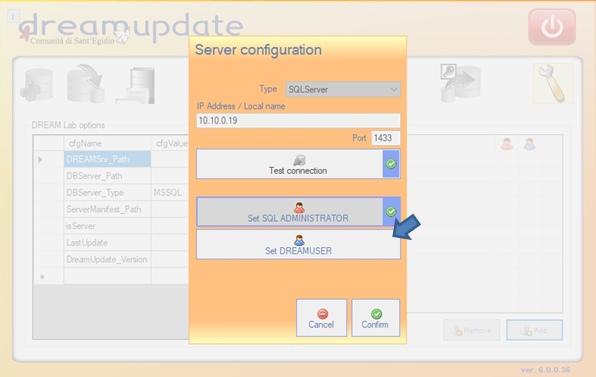
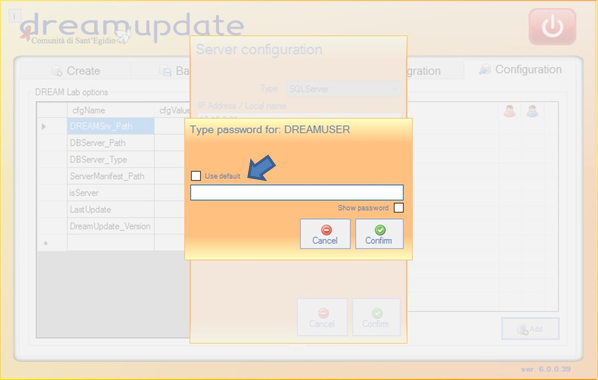
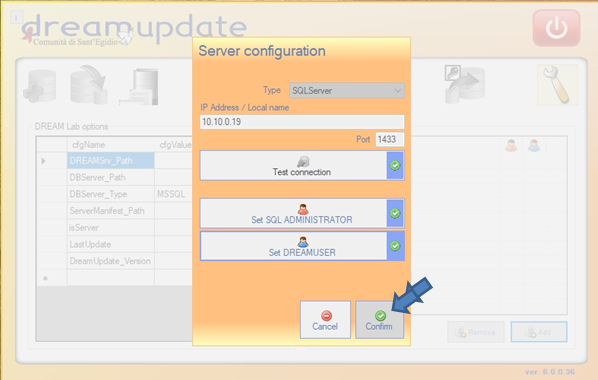
First of all configure the application: choose the Configuration Tab
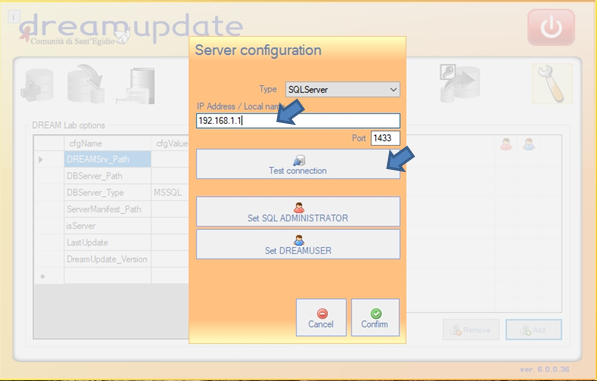
Click on the ADD button to add a server to manage.
Choose the Database server type: SQLServer
If DREAMUpdate application is running on the same server where SQL Server is running write 127.0.0.1 in the Ip address field.
1.3.Migration to the new DREAM UPDATE
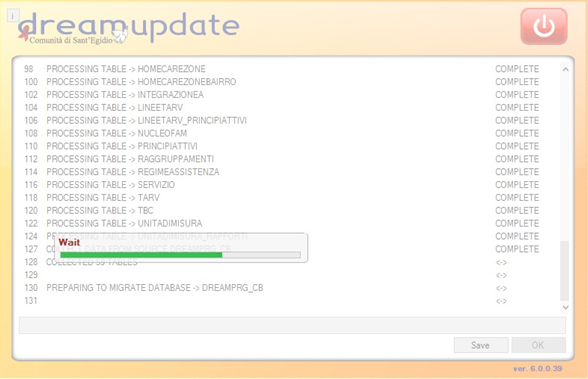
This function is required ONLY to migrate from version 5 to 6. This operation must be done only once for database.
WARNING:
THERE ARE SOME REQUIRED OPERATIONS TO BE DONE BEFORE THE MIGRATION
– No one should use the DreamCen software during the processing
– First make a FULL DATABASE BACKUP
(using the DB Management software “es SQL.Management Studio”)
Note: Migration can be used also to do others operation on the database like transform MSSQL in MySQL database but these use actually are not supported.
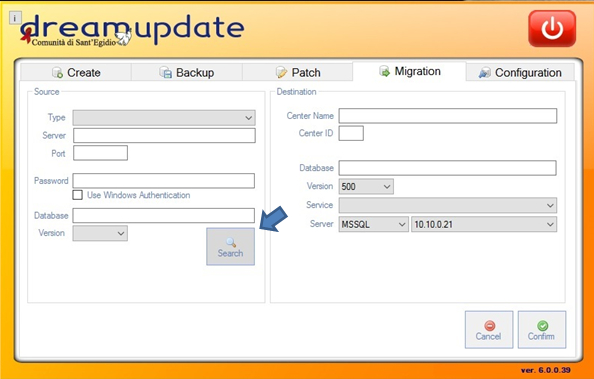
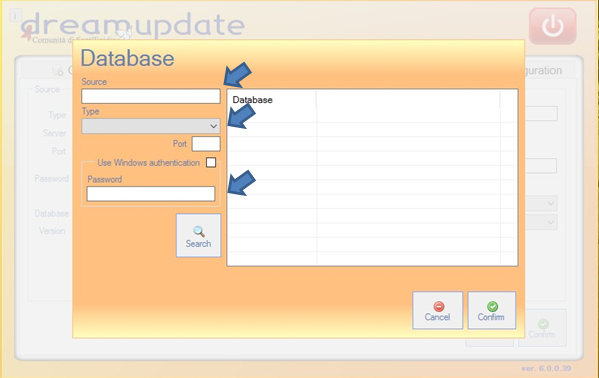
• TYPE THE SOURCE -> TYPE
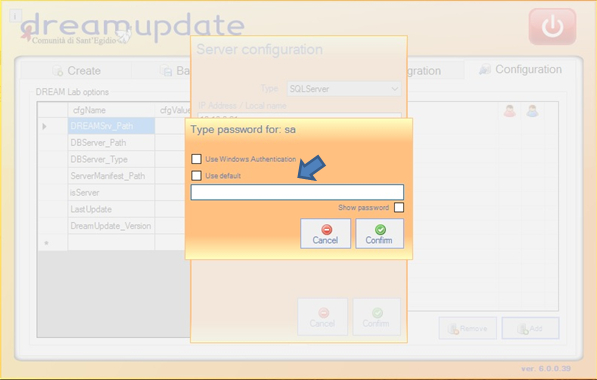
• TYPE THE PASSWORD OF “sa” OR USE WINDOWS AUTHENTICATION IF THE SOFTWARE IS ON THE SAME SERVER OF THE DATABASE
• CLICK SEARCH
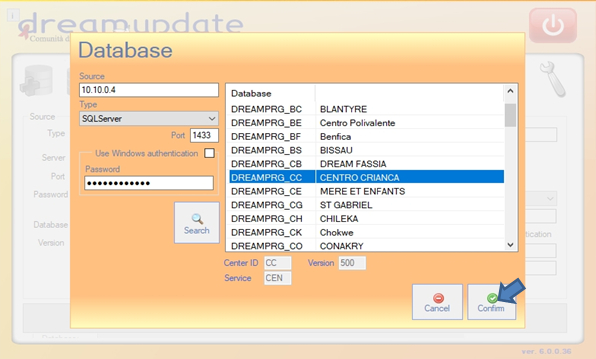
• CLICK CONFIRM
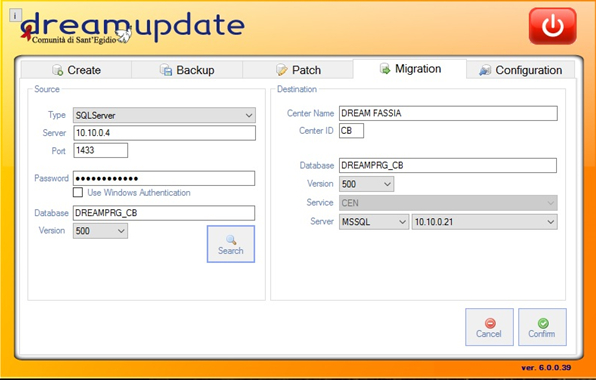
• CLICK CONFIRM
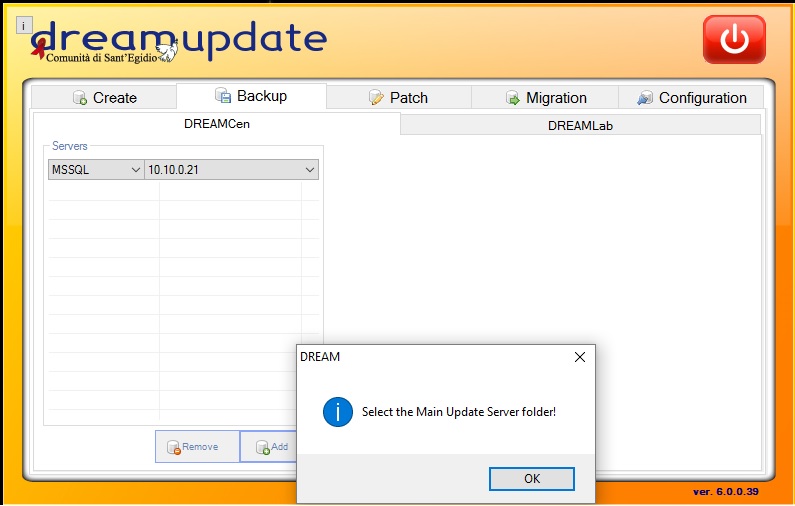
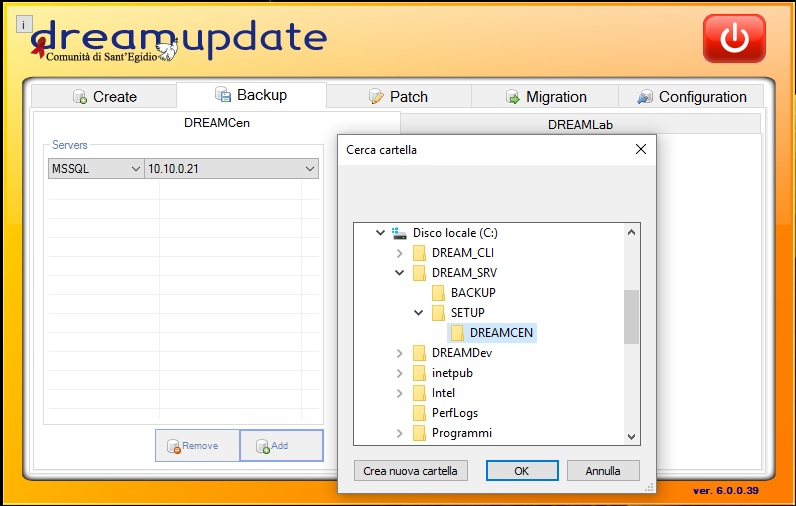
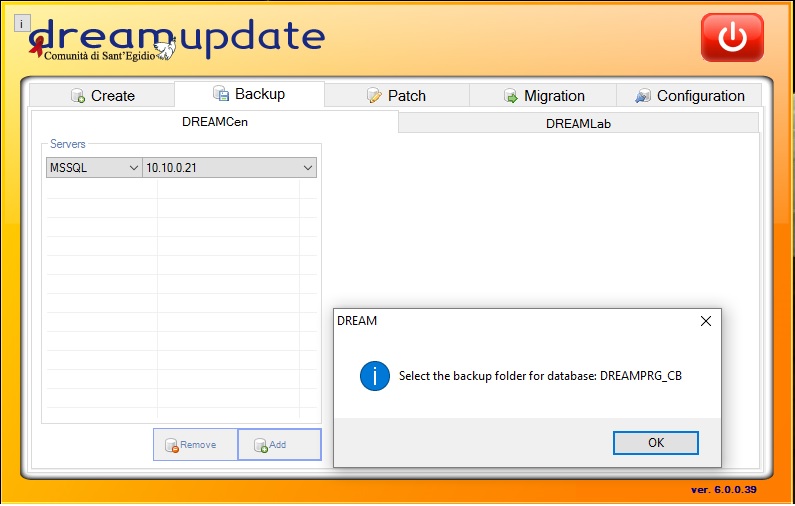
1.4.Backup Management
Backup Configuration
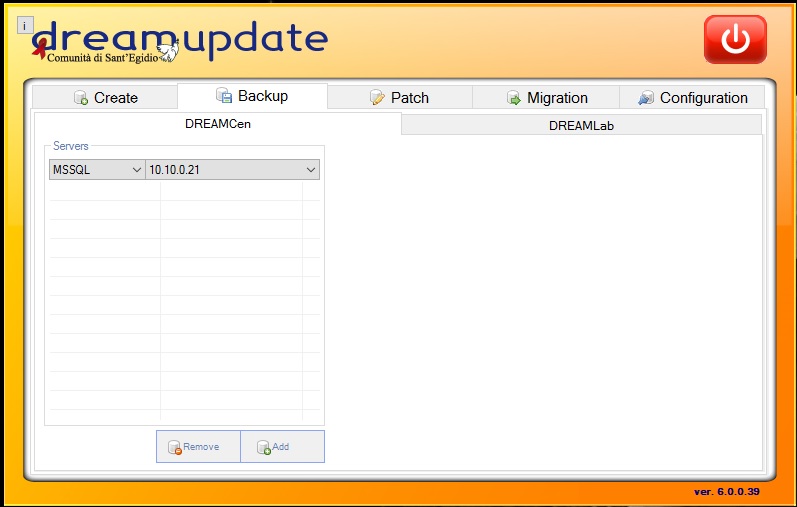
• CLICK ADD
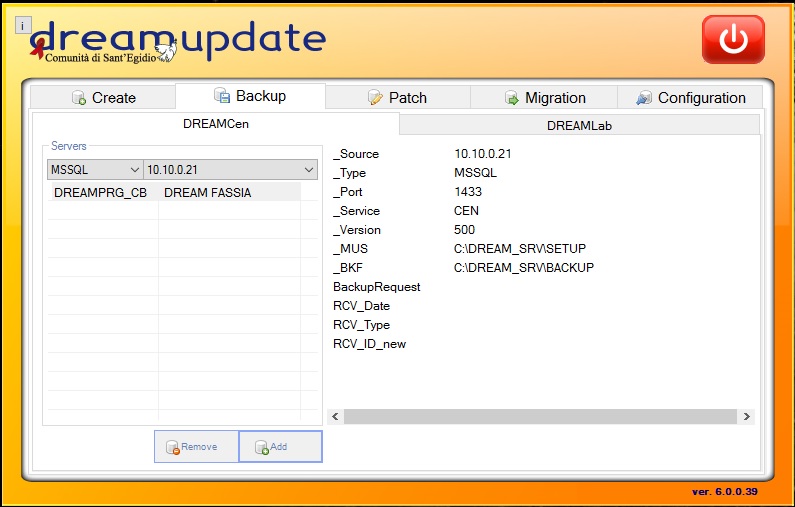
BACKUP FUNCTIONS
From this section you can create and restore backup and send to DREAM central control and backup service.The new dreamupdate permit also to automatically upgrade the dreamCen software with a scheduled task (see next section)
![]()
INCREMENTAL -> MAKE INCREMENTAL BACKUP
FULL -> MAKE FULL BACKUP
AUTOMATIC -> MAKE SYNC BACKUP WITH DREAMAPI SERVICE
RESTORE -> RESTORE EXISTING BACKUP
SEND -> SEND BACKUP(S) TO DREAM FTP
CLIENT UPDATE -> UPDATE DREAMCEN CLIENT PROGRAM
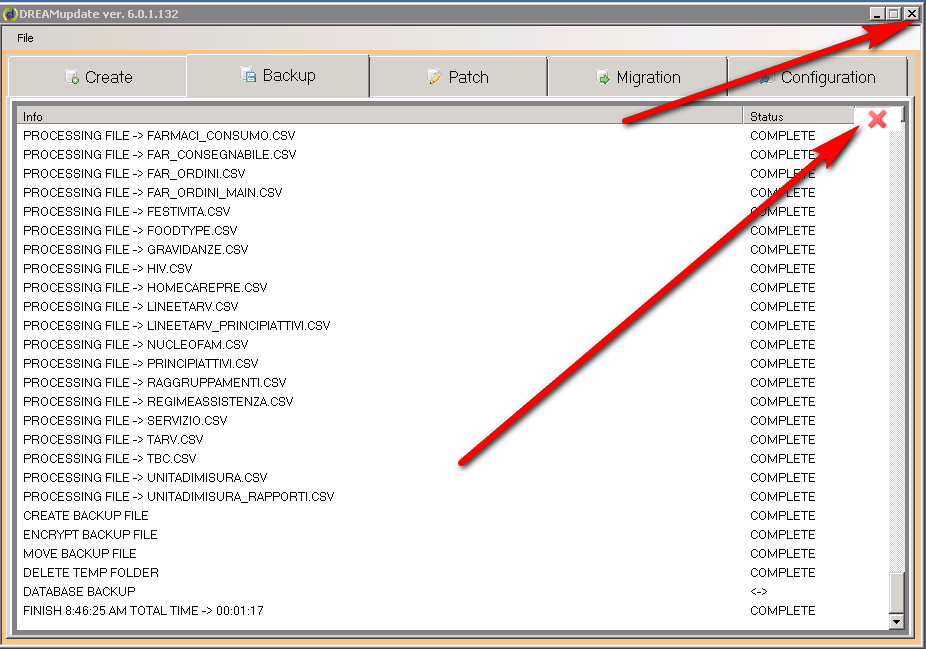
1.5.How to create a Full Backup with DreamUpdate
Start dreamupdate  (usually the executable is in c:\dream_srv\dreamupdate folder)
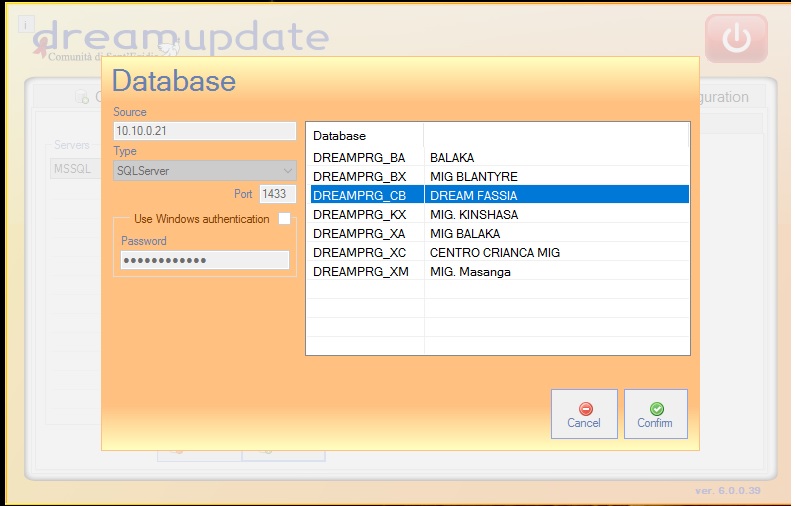
1) Select the database
2) Click on “Full”
3) Annotate the backup destination folder shown in the field _BKF
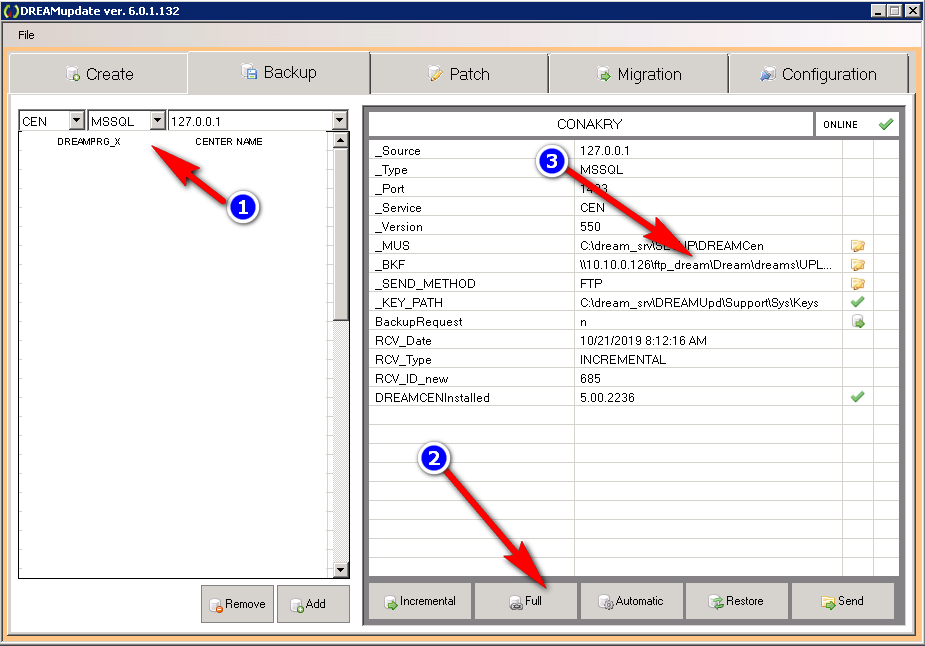
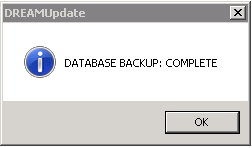
4) Wait for the “Database Backup: Complete” message box
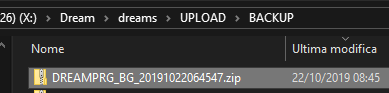
5) Use File Explore to find the backup file in the folder you have annotate in point 3
6) Finally remember to close the dreamupdate software
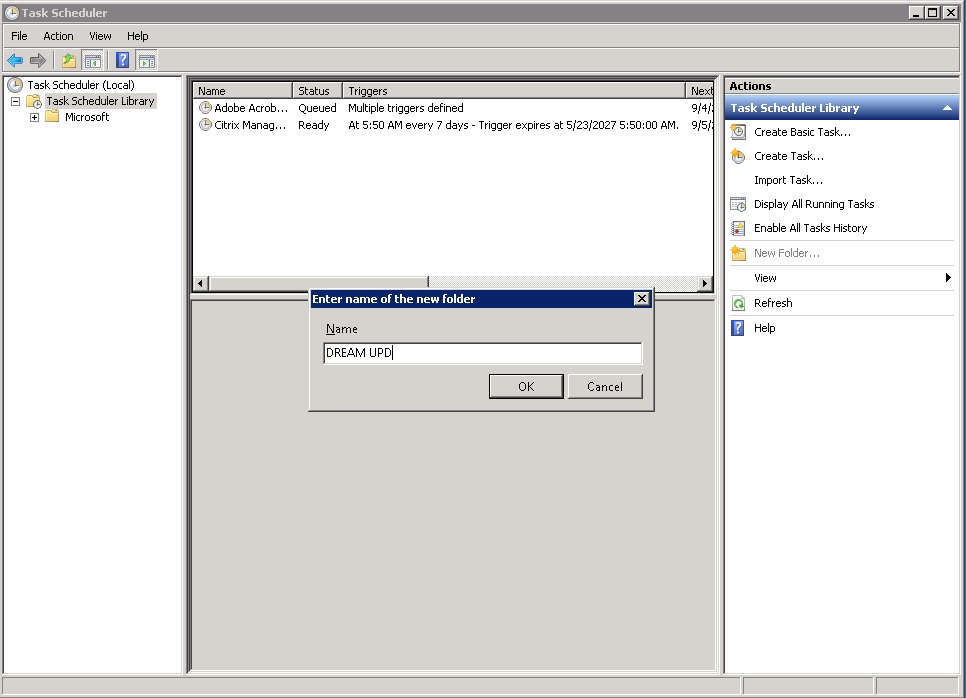
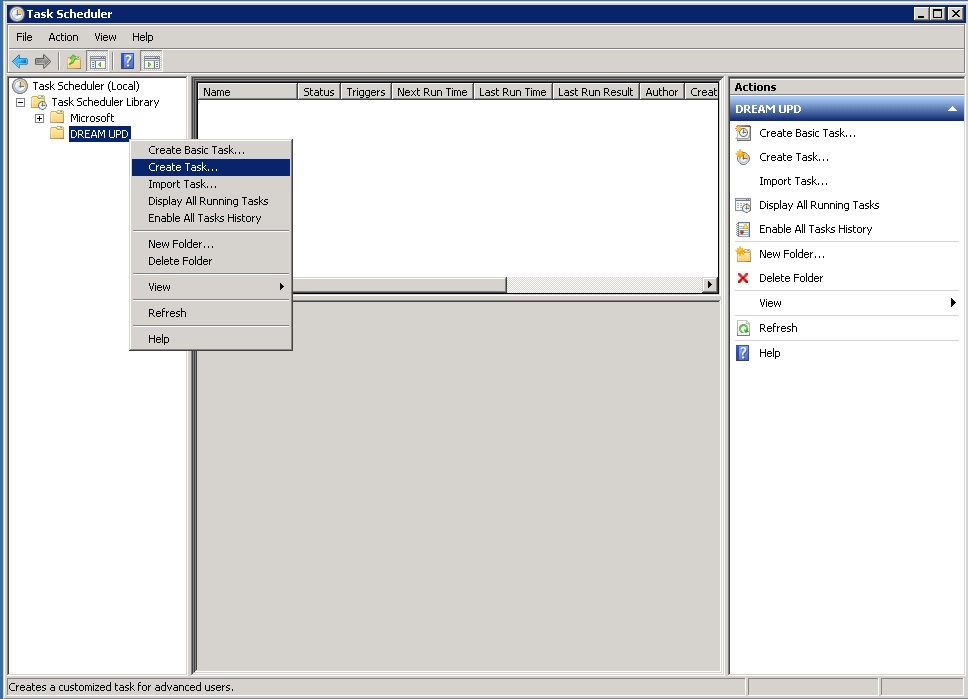
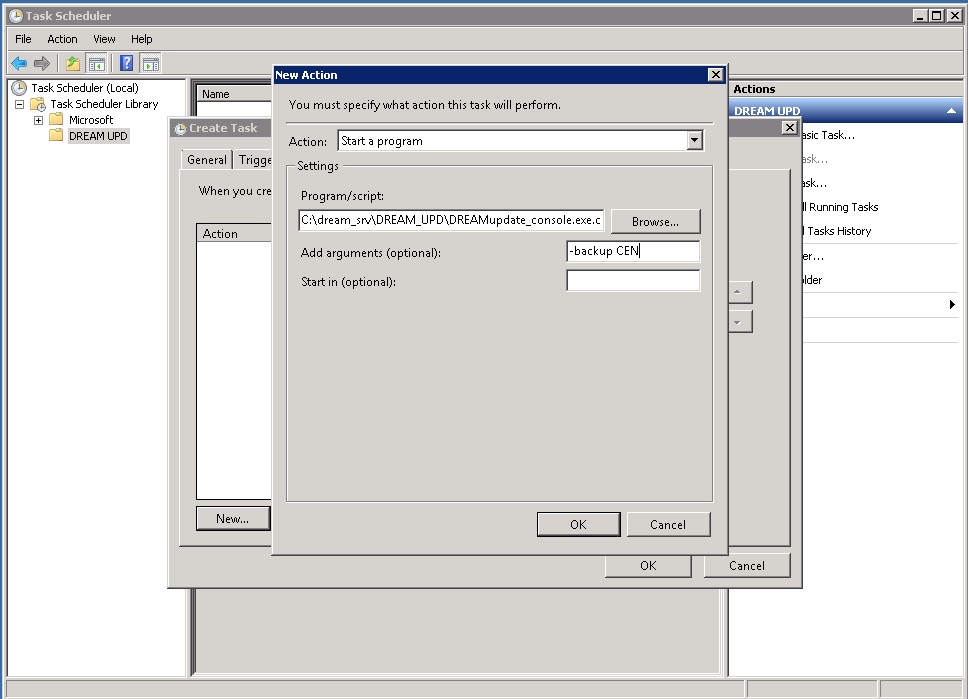
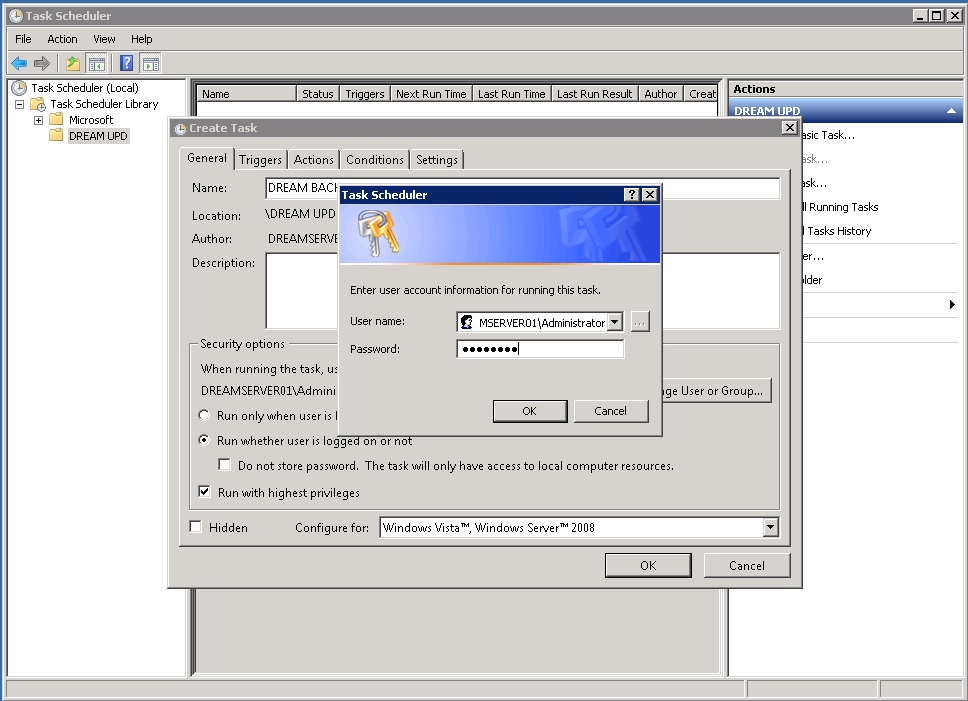
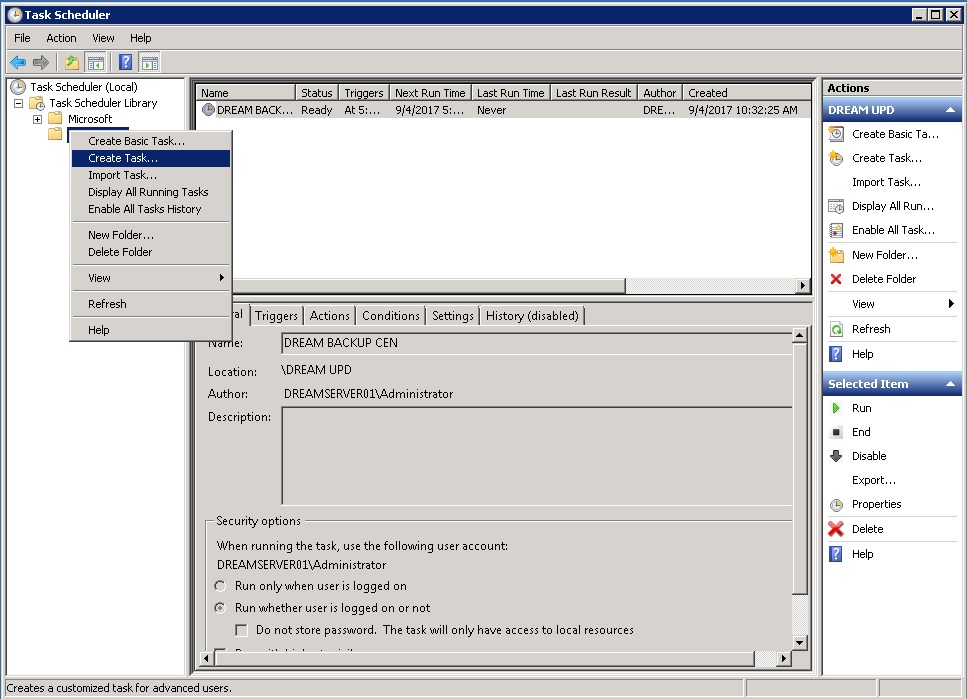
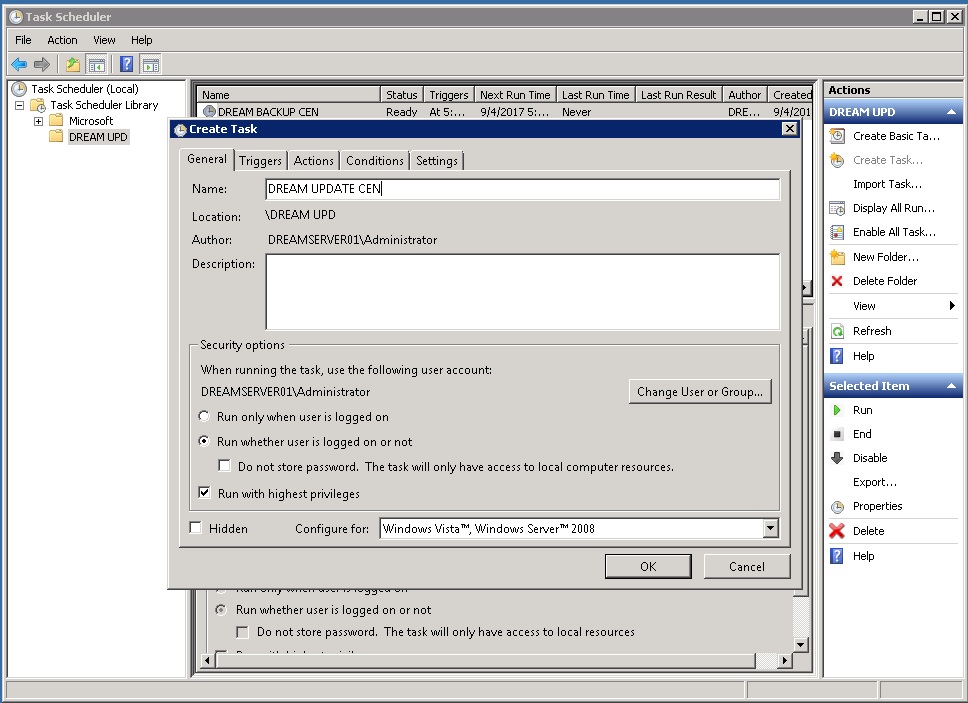
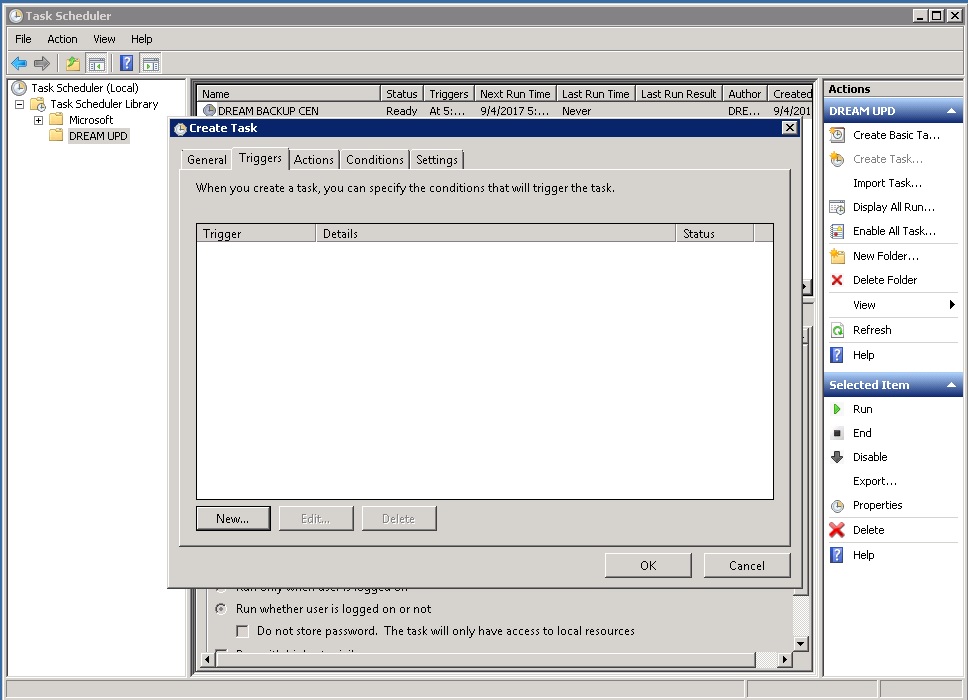
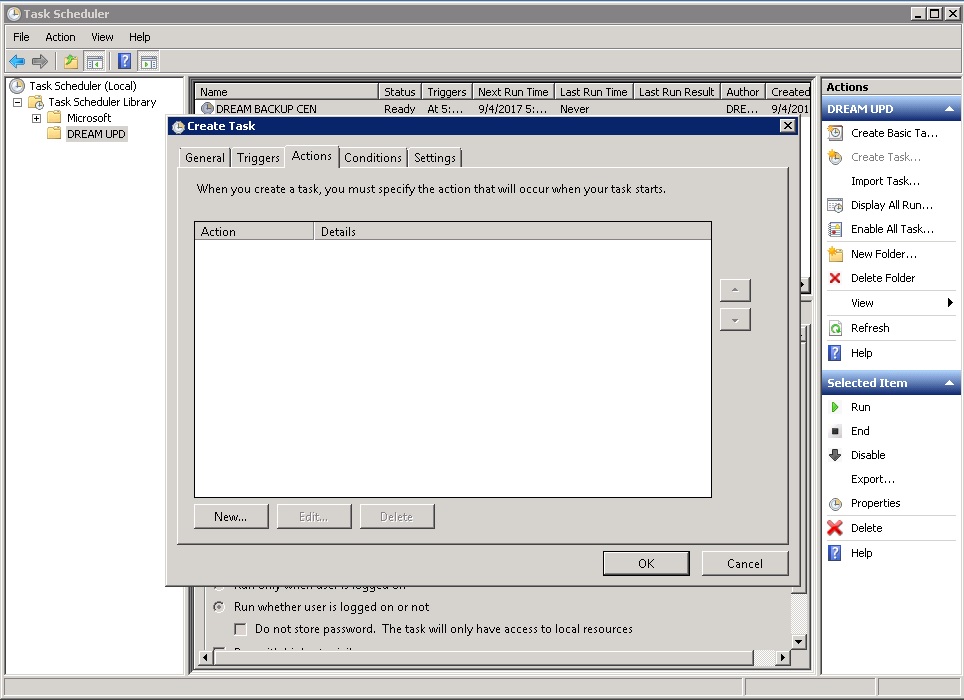
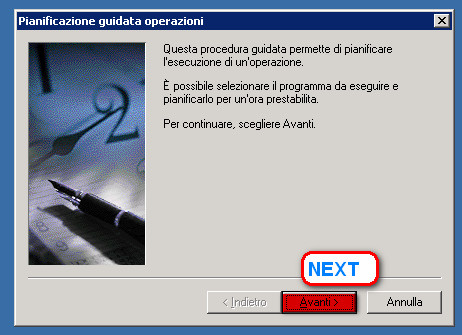
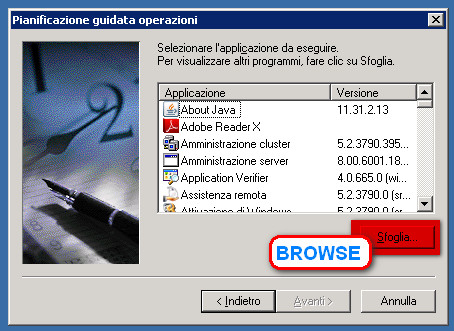
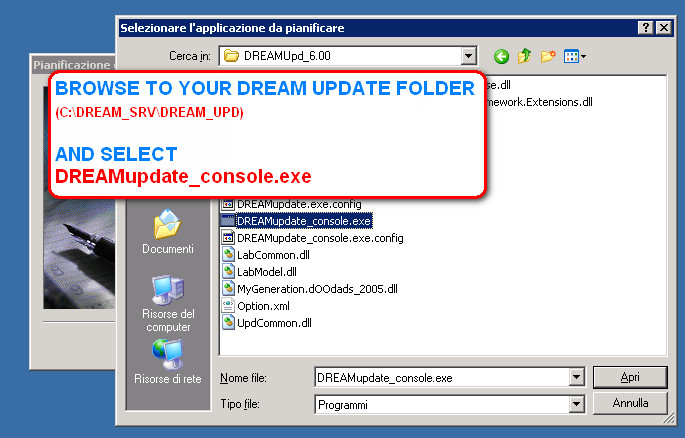
1.6.Scheduled TASKS
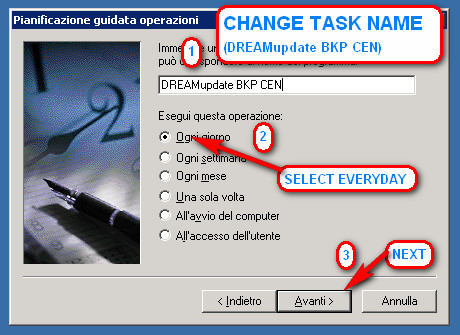
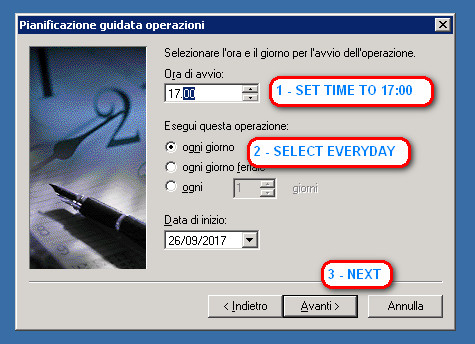
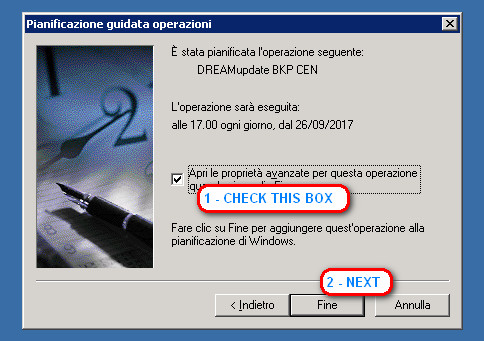
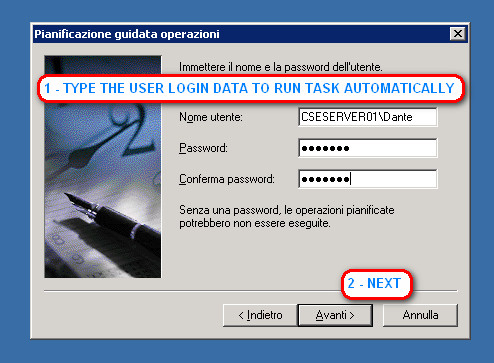
Task Scheduler is present in all the various versions of Windows and helps the user to schedule the automatic execution of many tasks. In this case we configure two scheduled task both for the UPDATE of dreamCen software and for BACKUP and send. YOU CAN DISABLE the OLD dream scheduled tasks for the same purposes.
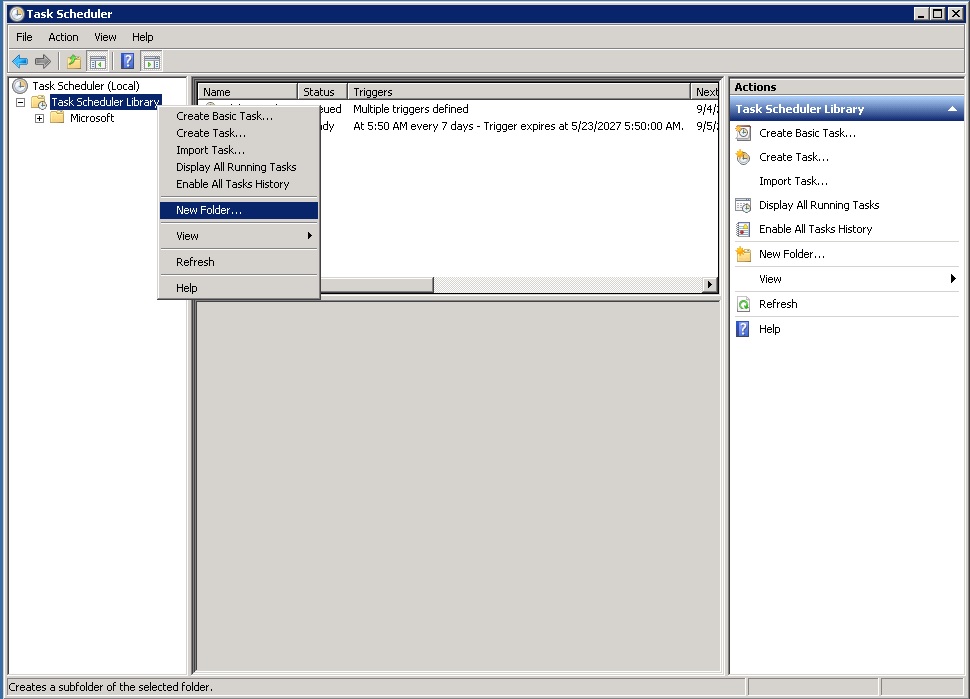
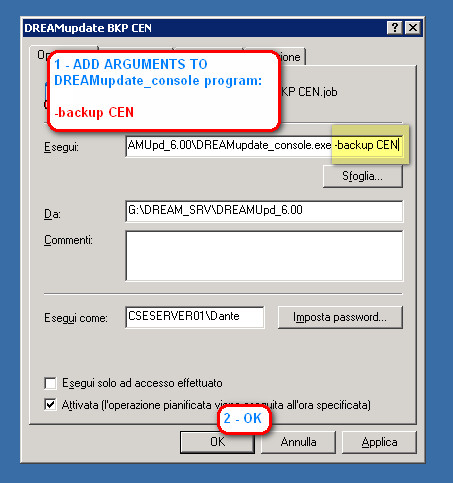
CREATE THE TASK TO BACKUP THE DATABASE ON THE CLOUD
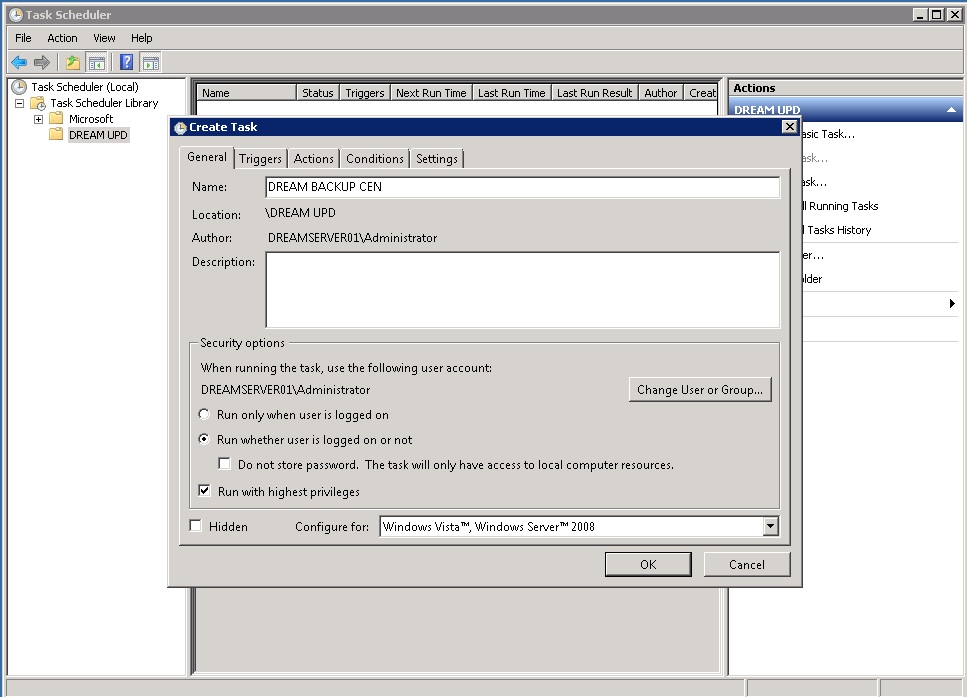
• CLICK ON “RUN WITH HIGHEST PRIVILIEGES”
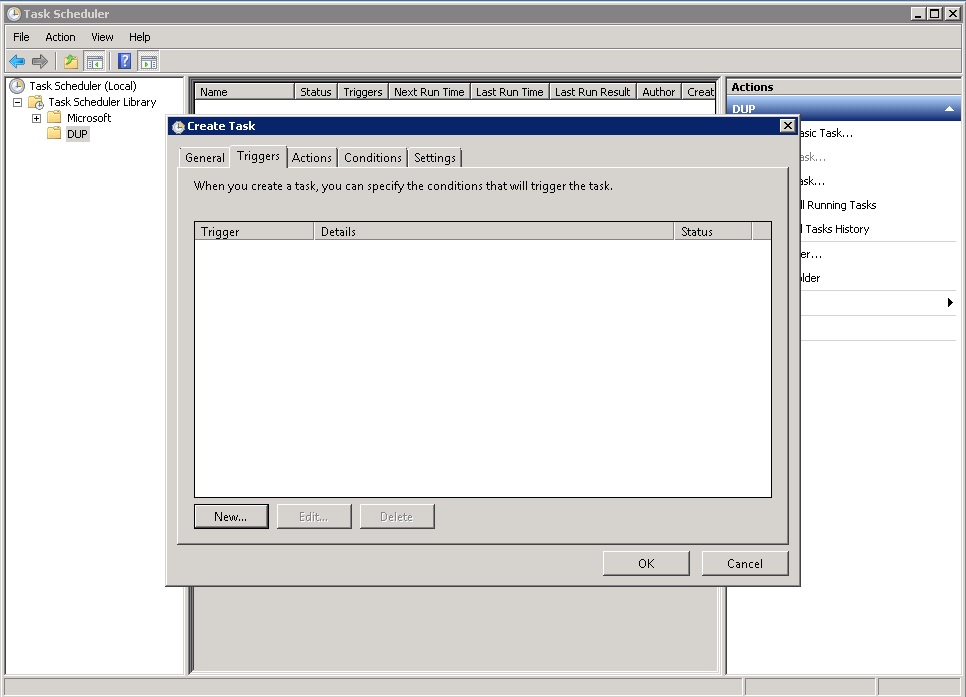
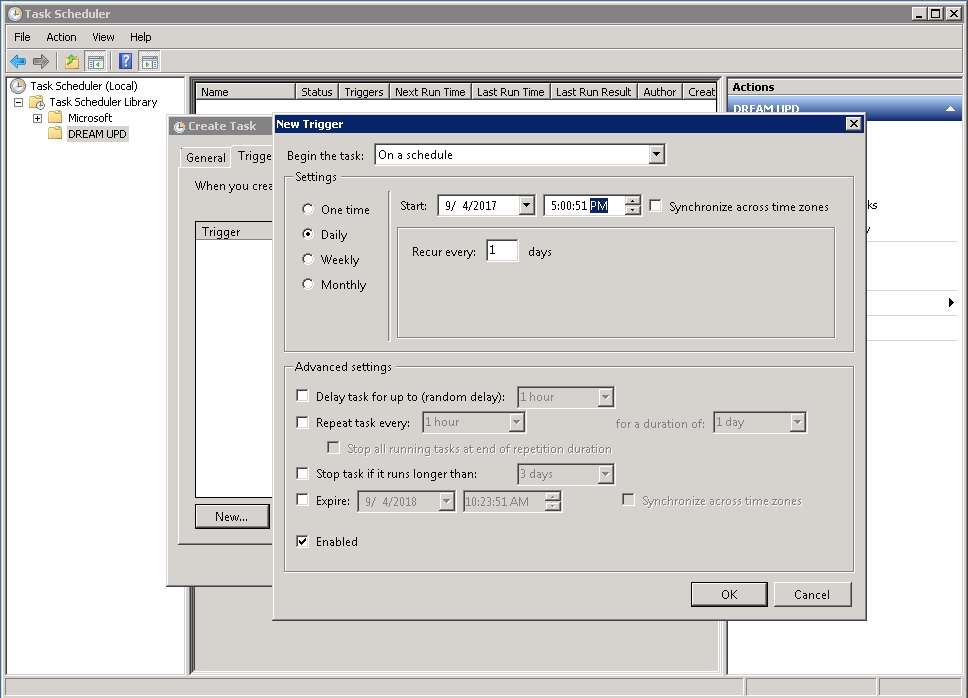
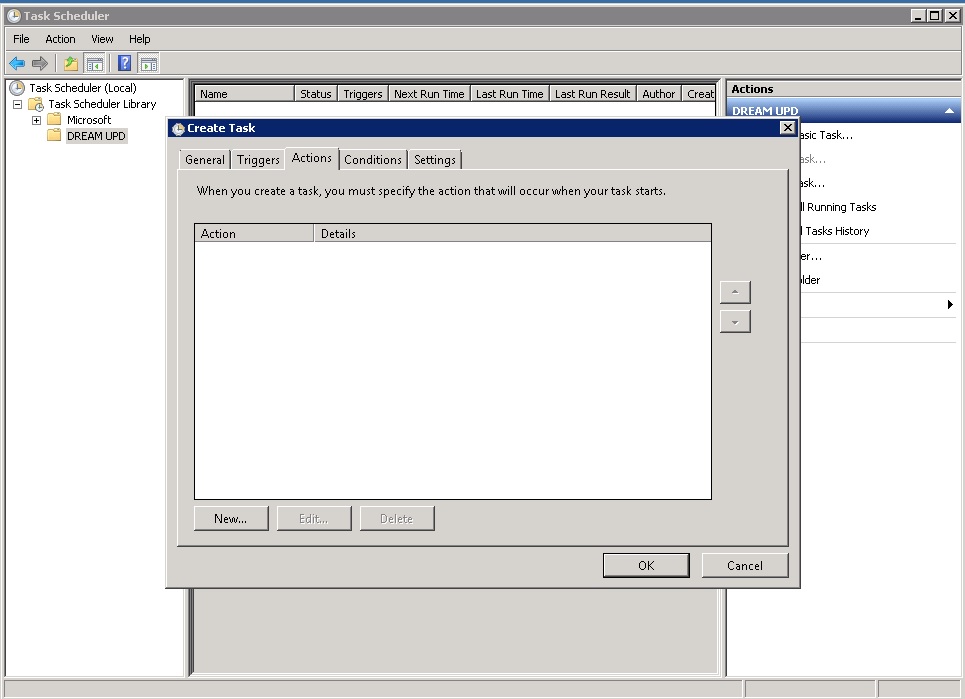
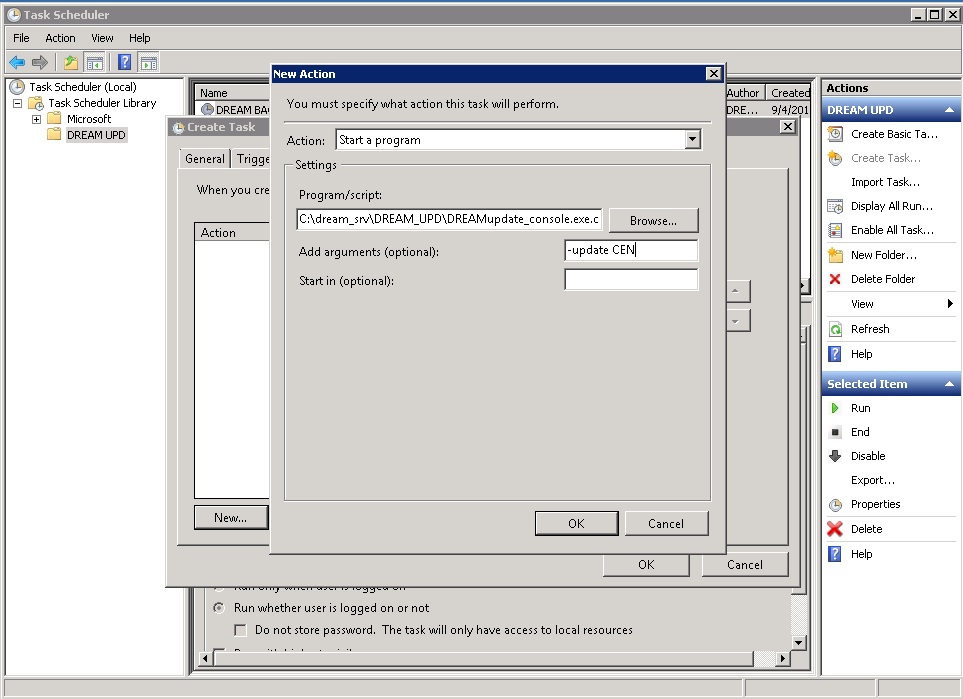
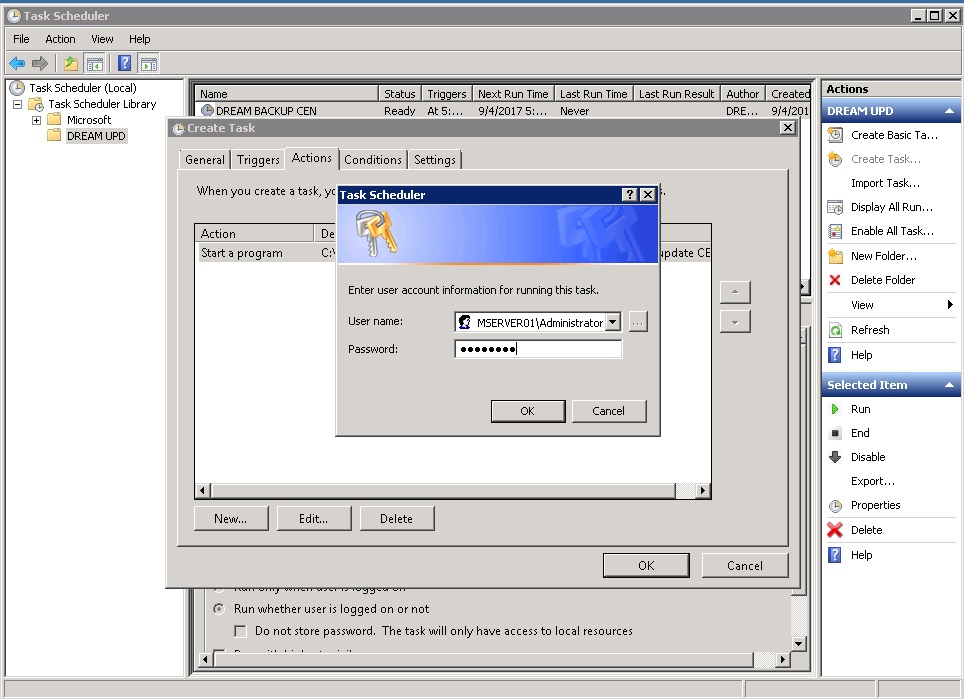
• CLICK NEW

AND CLICK on OK
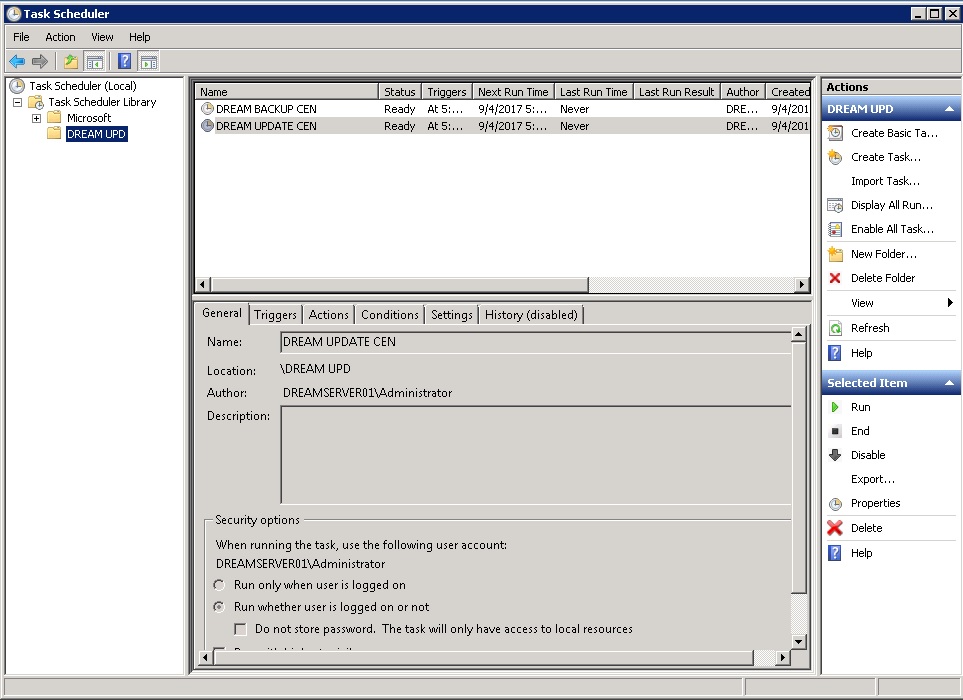
VERIFY THAT THE TASK IS ENABLED
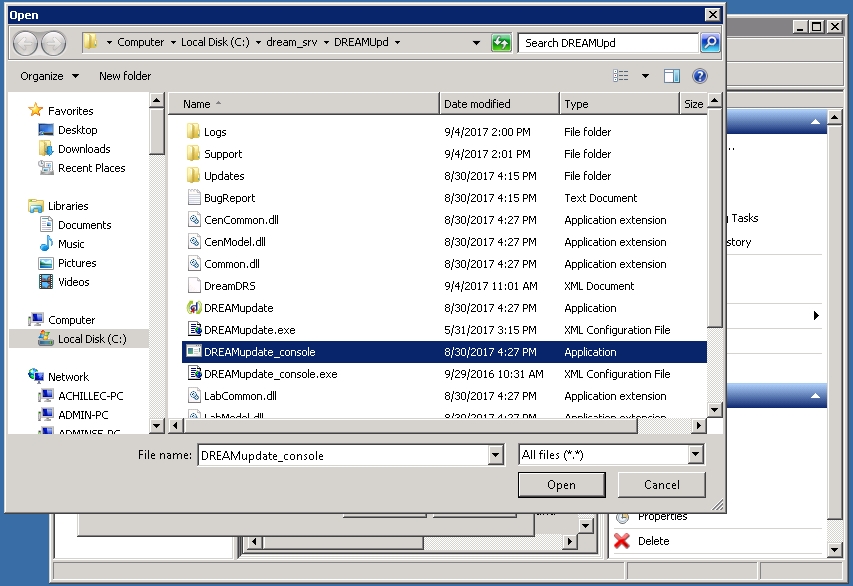
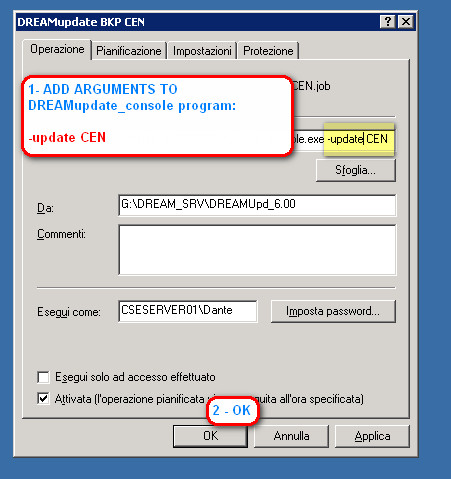
CREATE THE TASK TO AUTO-UPDATE THE SOFTWARE

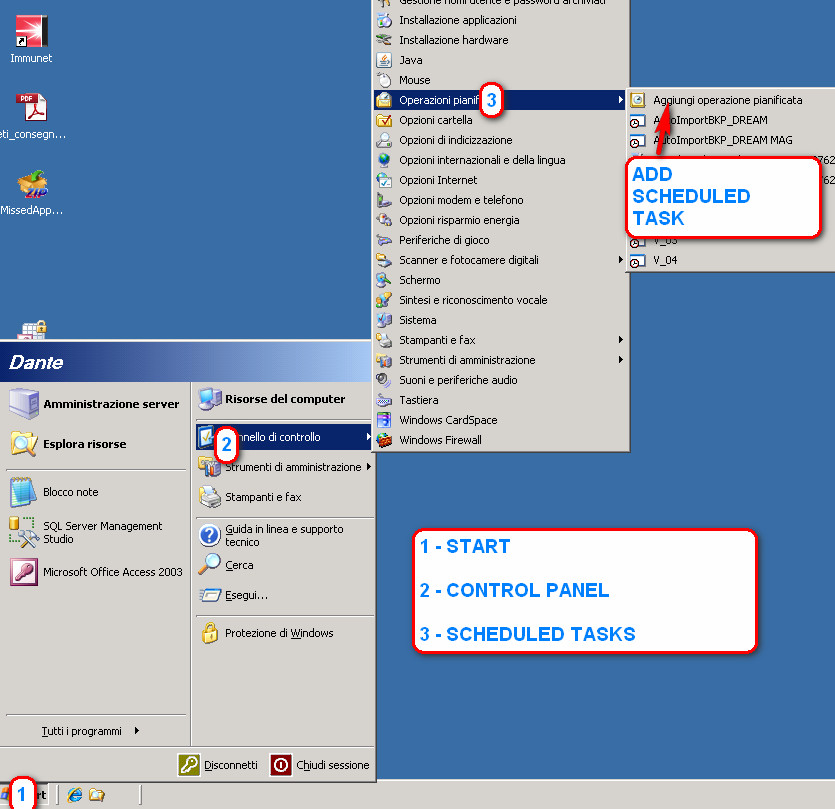
1.7.Scheduled TASKS on Windows Server 2003
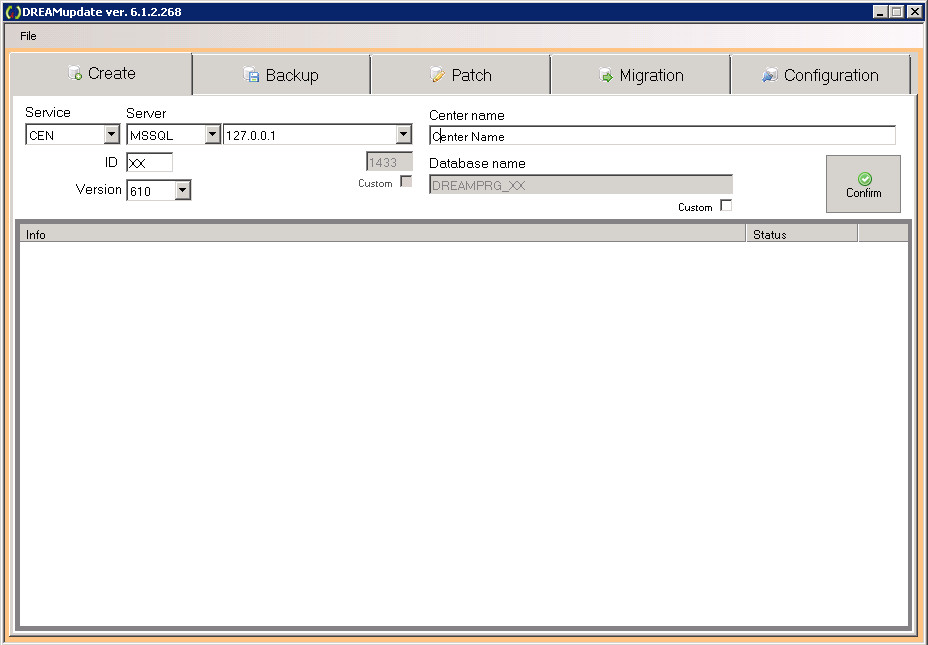
1.8.DATABASE Creation
Use this section to create a new database for DreamCen, DreamFar,DreamLab.
- SELECT THE SERVICE AND SERVER (write 127.0.0.1 if dreamupdate is running on the same server where SQL Server is running)
- CHOOSE THE ID AND CENTER NAME
- CLICK CONFIRM and wait for the database creation to complete
1.9.Check missed appointments with dreamupdate console
To have appointments automatically marked as missed after a predefined number of days, you need to create a scheduled task that runs the following command:
dreamupdate_console -missedapp
or , if you want to specify a particular center:
dreamupdate_console -missedapp XX (where XX is the center code)
1.10.Automatically import exams results from laboratory with dreamupdate console
Starting from release 281 DREAMUpdate software can import lab results via scheduled task
You have only to create a new task at the desidered hour specifying one of the commands below:
for those who use LAN:
dreamupdate_console -importresults LAN
for those who use XML/PENDRIVE:
dreamupdate_console -importresults XML
If you need to specify the path:
dreamupdate_console -importresults C:\DREAMLAB_RESULTS